<!DOCTYPE HTML PUBLIC "-//W3C//DTD HTML 4.0 Transitional//EN">
<HTML>
<HEAD>
<TITLE> JASKO 샘플 페이지 </TITLE>
<META NAME="Generator" CONTENT="EditPlus">
<META NAME="Author" CONTENT="Elbis">
<META NAME="Keywords" CONTENT="JavaScript, 자바스크립트">
</HEAD>
<BODY>
<!------------------------- 팝업 윈도우 열기 ----------------------->
<center>
<H3>새 창 열기</H3>
<FORM>
<input type="button" Value=" 야후! 코리아 " ONCLICK="window.open('
http://www.yahoo.co.kr/', 'Sample', 'toolbar=no,location=yes,directories=no,status=no,menubar=no,scrollbars=yes,resizable=no,copyhistory=yes,width=400,height=300')">
</FORM>
<font size=2 color=teal><b>소스코드</b></font><br>
<textarea rows=5 cols=50 style="background-color:#EEEEEE">
<!-- 아래의 방법으로 원하는 위치에 코드를 붙여 넣습니다 -->
<input type="button" Value=" 야후! 코리아 " ONCLICK="window.open('
http://www.yahoo.co.kr/', 'Sample', 'toolbar=no,location=yes,directories=no,status=no,menubar=no,scrollbars=yes,resizable=no,copyhistory=yes,width=400,height=300')">
<!-- 옵션중에서 어느 한가지만 지정하면 나머지 옵션들은 전부 no 로 지정됩니다-->
<!-- 예 -->
<input type="button" Value=" 야후! 코리아 " ONCLICK="window.open('
http://www.yahoo.co.kr/', 'Sample', 'width=400,height=300')">
</textarea>
<hr>
<!------------------------- 폼 메일 보내기 ----------------------->
<H3>폼을 이용한 메일 보내기</H3>
<script language="JavaScript">
function mailMe( form ) {
// 여기에 체크 코드를 입력합니다
return true;
}
</script>
<form name="testform" method="POST" action="mailto:
babo@babo.com?subject='메일제목'" onSubmit="return mailMe( this.form )" enctype="text/plain">
홈페이지 주소:<br>
<input type="text" name="URLbox" value="http://" size=50><br>
내용을 입력 하세요:<br></font>
<input type="text" name="titlebox" value="" size=50>
</form>
<form name="testform" method="POST" action="mailto:
babo@babo.com?subject='메일제목'" onSubmit="return mailMe( this.form )" enctype="text/plain">
<input type="submit" value=" 확인 ">
</form>
<font size=2 color=teal><b>소스코드</b></font><br>
<textarea rows=5 cols=50 style="background-color:#EEEEEE">
<!-- 아래의 방법으로 원하는 위치에 코드를 붙여 넣습니다 -->
<script language="JavaScript">
function mailMe( form ) {
// 여기에 체크 코드를 입력합니다
return true;
}
</script>
<form name="testform" method="POST" action="mailto:
babo@babo.com?subject='메일제목'" onSubmit="return mailMe( this.form )" enctype="text/plain">
홈페이지 주소:<br>
<input type="text" name="URLbox" value="http://" size=50><br>
내용을 입력 하세요:<br></font>
<input type="text" name="titlebox" value="" size=50>
</form>
<form name="testform" method="POST" action="mailto:
babo@babo.com?subject='메일제목'" onSubmit="return mailMe( this.form )" enctype="text/plain">
<input type="submit" value=" 확인 ">
</form>
</textarea>
<!------------------------- 링크 버튼 만들기 ----------------------->
<hr>
<H3>링크버튼 만들기</H3>
<form>
<INPUT TYPE="button" VALUE="야후! 코리아" onClick="parent.location='
http://www.yahoo.co.kr'"></form>
<font size=2 color=teal><b>소스코드</b></font><br>
<textarea rows=5 cols=50 style="background-color:#EEEEEE">
<!-- 아래의 방법으로 원하는 위치에 코드를 붙여 넣습니다 -->
<INPUT TYPE="button" VALUE="야후! 코리아" onClick="parent.location='
http://www.yahoo.co.kr'">
</textarea>
<hr>
<!------------------------- 프레임간 링크 버튼 ----------------------->
<H3>프레임간 링크버튼 만들기</H3>
<form>
<INPUT TYPE="button" VALUE="야후! 코리아" onClick="parent.main.location='
http://www.yajoo.co.kr'"></form>
<FONT SIZE="2" COLOR="blue">이 스크립트는 프레임이 없는 현재 상태에서는 에러가 납니다</FONT>
<br>
<font size=2 color=teal><b>소스코드</b></font><br>
<textarea rows=5 cols=50 style="background-color:#EEEEEE">
<!-- 아래의 방법으로 원하는 위치에 코드를 붙여 넣습니다 -->
<INPUT TYPE="button" VALUE="야후! 코리아" onClick="parent.main.location='
http://www.yajoo.co.kr'">
<!-- 여기서 main 은 보여주고자 하는 프레임명 입니다 -->
</textarea>
<hr>
<!------------------------- 뒤로가기/앞으로가기 ----------------------->
<H3>뒤로가기 / 앞으로 가기</H3>
<SCRIPT LANGUAGE="JavaScript">
<!--
function goHist(a)
{
history.go(a);
}
//-->
</script>
<FORM METHOD="post">
<INPUT TYPE="button" VALUE=" 뒤로가기 " onClick="goHist(-1)">
<INPUT TYPE="button" VALUE="앞으로 가기" onClick="goHist(1)">
</form>
<font size=2 color=teal><b>소스코드</b></font><br>
<textarea rows=5 cols=50 style="background-color:#EEEEEE">
<!-- 아래의 방법으로 원하는 위치에 코드를 붙여 넣습니다 -->
<SCRIPT LANGUAGE="JavaScript">
<!--
function goHist(a)
{
history.go(a);
}
//-->
</script>
<FORM METHOD="post">
<INPUT TYPE="button" VALUE=" 뒤로가기 " onClick="goHist(-1)">
<INPUT TYPE="button" VALUE="앞으로 가기" onClick="goHist(1)">
</form>
<!--
2 페이지 앞으로 가려면 goHist(2)
2 페이지 뒤로 가려면 goHist(-2)
-->
</textarea>
<hr>
<!------------------------- 프레임에서 뒤로/앞으로 가기 ----------------------->
<H3>프레임에서 뒤로/앞으로 가기</H3>
<form>
<INPUT TYPE="button" VALUE=" 뒤로가기 " onClick="parent.main.history.back()">
<INPUT TYPE="button" VALUE=" 앞으로 가기 " onClick="parent.main.history.forward()"><BR><BR>
<FONT SIZE="2" COLOR="blue">이 스크립트는 프레임이 없는 현재 상태에서는 에러가 납니다</FONT>
<br>
<font size=2 color=teal><b>소스코드</b></font><br>
<textarea rows=5 cols=50 style="background-color:#EEEEEE">
<!-- 아래의 방법으로 원하는 위치에 코드를 붙여 넣습니다 -->
<INPUT TYPE="button" VALUE=" 뒤로가기 " onClick="parent.main.history.back()">
<INPUT TYPE="button" VALUE=" 앞으로 가기 " onClick="parent.main.history.forward()">
<!--
여기에서 main 은 프레임 이름 입니다
-->
</textarea>
<HR>
<!------------------------- 소스 보기 ----------------------->
<H3>소스 보기</H3>
<FORM>
<INPUT TYPE="BUTTON" VALUE=" 소스 보기 " onClick= 'window.location = "view-source:" + window.location.href'>
</form>
<font size=2 color=teal><b>소스코드</b></font><br>
<textarea rows=5 cols=50 style="background-color:#EEEEEE">
<!-- 아래의 방법으로 원하는 위치에 코드를 붙여 넣습니다 -->
<INPUT TYPE="BUTTON" VALUE=" 소스 보기 " onClick= 'window.location = "view-source:" + window.location.href'>
</textarea>
<HR>
<!------------------------- 프레임 소스 보기 ----------------------->
<H3>프레임 소스 보기</H3>
<FORM>
<INPUT TYPE="BUTTON" VALUE=" 소스보기 " onClick= 'parent.menu.location = "view-source:" + parent.menu.location'>
</form>
<FONT SIZE="2" COLOR="blue">이 스크립트는 프레임이 없는 현재 상태에서는 에러가 납니다</FONT>
<br>
<font size=2 color=teal><b>소스코드</b></font><br>
<textarea rows=5 cols=50 style="background-color:#EEEEEE">
<!-- 아래의 방법으로 원하는 위치에 코드를 붙여 넣습니다 -->
<INPUT TYPE="BUTTON" VALUE=" 소스보기 " onClick= 'parent.menu.location = "view-source:" + parent.menu.location'>
<!--
여기에서 menu 는 프레임 이름 입니다
-->
</textarea>
<hr>
<!------------------------- 새로고침 --------------------------------->
<H3>페이지 새로고침</H3>
<form>
<INPUT TYPE="button" VALUE=" 새로고침 " onClick='parent.location="javascript:location.reload()"'>
</form>
<font size=2 color=teal><b>소스코드</b></font><br>
<textarea rows=5 cols=50 style="background-color:#EEEEEE">
<!-- 아래의 방법으로 원하는 위치에 코드를 붙여 넣습니다 -->
<INPUT TYPE="button" VALUE=" 새로고침 " onClick='parent.location="javascript:location.reload()"'>
</textarea>
<HR>
<!------------------------- 프레임 새로 고침 ----------------------->
<H3>프레임 새로고침</H3>
<form>
<INPUT TYPE="button" VALUE=" 프레임 새로고침 " onClick='parent.main.location="javascript:location.reload()"'>
</form>
<FONT SIZE="2" COLOR="blue">이 스크립트는 프레임이 없는 현재 상태에서는 에러가 납니다</FONT>
<br>
<font size=2 color=teal><b>소스코드</b></font><br>
<textarea rows=5 cols=50 style="background-color:#EEEEEE">
<!-- 아래의 방법으로 원하는 위치에 코드를 붙여 넣습니다 -->
<INPUT TYPE="button" VALUE=" 프레임 새로고침 " onClick='parent.main.location="javascript:location.reload()"'>
<!--
여기에서 main 은 프레임 이름 입니다
-->
</textarea>
</center>
</BODY>
</HTML>

 아티보드 테이블 정의서.xls
 ArtyboardV15_20080201_Full.zip


 FlashChat.rar
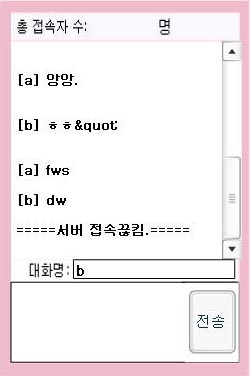


 print.html